Accessing Computer behind usb tethering in Android
- Hemil Ruparel 11 August, 2022
Feel free to skip to the final solution in case that is what you are looking for. The idea of this blog post is to show how I found a solution so others can learn from it :)
Note: This entire process took over 5 hours. This is just a summary of what I did so you can learn to not repeat the mistakes I did.
Conclusion
If you want to access a machine that is connected to the internet using USB tethering or personal hotspot,
Either:
- Use a proxy server app which will forward the packets for you or
- Write your own proxy server app
Context
I had an X11 application I am trying to debug. Its a very simple 50ish line C++ (actuall C code written in C++) that should in theory just draw a red window of 800 x 600 size. But I just get a white window instead. I get no errors. No log output. Nothing. So I decide, lets run X in debug.
So, I had a look at X docs for server debugging and it said, you better have a second machine. I had a mac and it is close enough to Unix so I started with it. The idea is, I ssh into my development machine from my mac. And attach gdb to xserver from there. Fair enough?
The problem:
The problem is my main development machine and the only machine with Linux installed (which is my primary development environment) is a Custom Built PC and I did not bother to put WiFi card.
So how do I access the internet then? Well, I connect my phone to the computer using the USB cable and turn on USB tethering. Problem is, the IP address of my computer is not directly reachable by others
Attempt 1 - Frantically try all possible ip addresses
listed by ip addr
As a first attempt, I ran ip addr on my development machine and found out about multiple ip addresses - some were virtual like ones created by docker, others were things like loopback, broadcast, etc. There was one interesting one 192.168.42.159. That seemed plausible but it didnt work. I tried ssh on my mac with all the ip addresses. None of them worked.
I checked the ip address of my mac using ifconfig. I got 192.168.1.x/24. The ip address of my phone is 192.168.1.y. I immediately recognize that the network created by my router is 192.168.1.Z/24. But my development PC is 192.168.42.159
USB tethering creates a private network!
Side note: The way you ssh into a computer (on linux at least) is you download openssh-server for your distro. Check your package manager index to find the package. It was openssh-server for my Debian 10 (Buster). Ensure it is running. If you have a system with systemd, typing
systemctl status sshd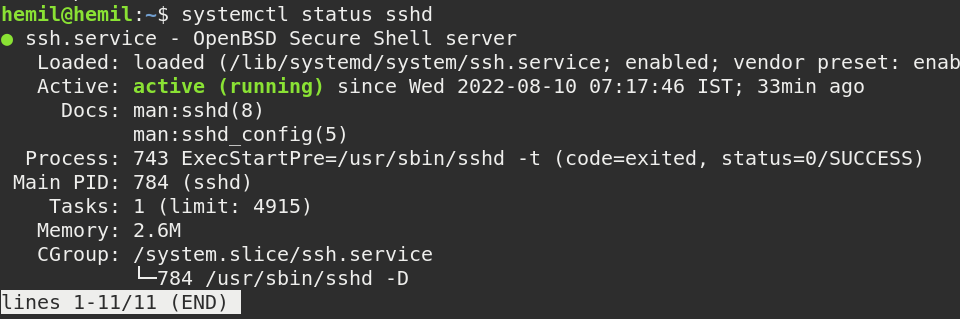
Attempt 2 - Port forwarding
The idea was this - set up my android phone to forward packets that it receives on port 22 to the ip address of my computer - 192.168.42.159. This would work because my phone had created the network 192.168.42.x/24. So, it can route the traffic to my computer and route the responses back to the computer which had initiated the connection.
There is a software called Android Debug Bridge. Its used in developing android applications. It allows you to control your phone or emulator in certain ways to debug the application like installing your app which you are still building without signing, simulating intents, etc. If you have done any work with Android app development, you know about ADB.
Note: To connect to your phone over ADB, you have to enable development mode and turn on USB debugging.
In one of the applications I had developed, I had pasted a command which allowed android to forward the packets to me. I quickly referred that. Its was:
adb reverse tcp:<port on android> tcp:<port on host>
Example - adb reverse tcp:8080 tcp:80 means if
someone tries to connect to 8080 on my android forward the
packets to the development machine's port 80.
Why is forwarding called reverse though? Because adb also has a command called adb forward which is used to forward packets from the development machine to the android phone. ADB reverse does the reverse, forwards packets from android to development machine.
SSH runs on port 22. Which if you know is a protected port. Ports
below 1024 cannot (usually) be accessed by non administrators.
The idea was forward port 22 on android to port 22 on my
development machine. So obviously,
adb reverse tcp:22 tcp:22
was denied permission.
I also tried adb shell which gives me a sh for my
phone. I tried modifying iptables to allow connections on port
22 but ofcourse, you need to be root to do that and there is
no way to do that on production devices without rooting your
phone.
You can be root on emulators I believe by typing:
adb root but it was denied because its a real phone
and a real security risk like say if I am using a cable to charge
my phone in public place and the other end is a computer that
can become root and mess up everything about my phone, steal
all my data, etc.
I must have spent like 2 hours on this. I tried everything I could, but it didnt work because of security reasons.
Attempt 3 - Considering Rooting phone
Now that my port forwarding attempt failed, I began to consider rooting my phone. Rooting is the process of unlocking the phone to get root access. Root is by default disabled for security reasons. Root access would allow me to simply reverse phone's tcp:22 to my development machine's tcp:22. Just like attempt 1. In case that failed, I had a backup. Manually add an entry in iptables to forward phone's tcp:22 to my development machine's tcp:22.
I watched numerous videos but I didnt like any of the solutions because -
- I didnt like the idea of installing an app to root my phone. Rooting is a very security sensitive operation and the app could in effect, take over my phone. That didnt sound right.
-
This is the only phone I own. I dont have a backup phone that
I could use to root and keep my personal phone as is. I found
out Rooting would factory reset my phone which I didnt want.
Yes I could create backups but my experience in the past says I always forget to backup something and its my only phone and I couldnt afford a new one right now so it wasn't worth the risk for me
Side note: My mac was taken away :(
So while I was doing this, a family member needed the mac. Now, I have 2 other windows laptops. But none of them had linux installed. I was familiar with the linux command line but not with Windows command line. Learning windows command prompt from scratch didnt seem like a good idea given the time constraints.
Many Linux distros have this feature of live usb. Basically, it means the .iso file is a complete OS and can be run straight from the USB or CD drive. It does not need to be copied over to a Hard drive or SSD. Now that is really cool. I knew this because I had used Fedora and Ubuntu with live usb. I needed a really small distro, capable of live usb.
After about 30 seconds of googling, I downloaded puppy and flashed it on my usb. This was the first time I used raw dd to do so instead of a GUI tool. So YAY! It was really not that difficult in retrospect. Command line is really powerful, but you can mess up your system in you are not careful. :) With great power comes great responsibility
I booted into puppy. I really liked it. The laptop I had was a 6th gen core i3 6006U - dual core, hyperthreaded, 12GB RAM and 512 GB SSD. It originally came with 4GB RAM and 1TB 5000rpm HDD. It was really slow. My maternal uncle was really kind to give me an extra 8GB stick and the 512GB SSD. In the original config, 4GB RAM and 1TB HDD, both fedora and windows were too slow to use. With the new upgrade, windows was still slow. I haven't used fedora on that laptop after the upgrade.
Puppy was really responsive even in this slow setup. I liked the default wallpaper showing me my cpu and ram usage. Overall, it looked good. All I wanted though was the terminal. By default, on the desktop they had console which is all I need. It felt really snappy.
The game is now on again :)
Attempt 3 - Forward some other port to my development machine's tcp:22
While I was looking for some solution, I realized ssh could be given
a port using -p flag. So for example,
ssh -p 8080 <username>@<ip address>
adb reverse tcp:8080 tcp:22 succeeded. Ah! Finally!
One would think this is over. I wish :(
Debugging port forwarding
Now, my new found laptop and my phone are connected to the same network. My development machine is connected to my phone using USB tethering on a different private network.
I tried
ssh -p 8080 <username>@<ip of phone>.
After what seemed to be a really long wait, the request timed out.
So, I tried pinging my phone. That worked. I again tried ssh
and it connected but connection refused.
Okay, so time to put on my networking engineer hat. Traceroute to the rescue. So I tried traceroute to my phone. It worked on the first hop. So, the phone is connected and replying and it is in the same network. So, I definitely have the correct IP adress.
Hmm. Interesting. I see the help page. I dont remember exactly but I somehow configured traceroute to specify the port and I also realised, it was using UDP like ping. So I also switch to TCP using the flags. This time, BAM! Connection Refused. I found the culprit
Port forwarding was working correctly but the port itself was not exposed to the outside world. Interesting. I tried to google if there was a default firewall in android. Could not find anything. I again attempted to update iptables to allow that. But again, permission denied.
Side Note: Sometimes, I would get timeouts while doing this. Pinging my phone fixed it. I dont know what was causing the problem - puppy linux, laptop's nic, the router or the phone or maybe even some combination of them.
Final solution - Building my own proxy
I realised what I really wanted was actually a proxy. The phone proxying the connection to the ssh server on my development machine. There were some apps that would have done that for me on the play store but I didnt feel right about using them. I decided to code the proxy myself. I mean I knew a little android and a lot more java. Yes, I hadnt used them in a month or so. But how hard could it be? And well, What could possibly go wrong?
During my diploma (I guess its called assosicate's degree outside India), we were taught both android and java at a basic level. I knew you had to use ServerSocket to create a socket on the server and Socket to create a socket on the client. Turns out you do the same in Android as well. Afterall, its a java runtime. Haha
My first implementation was something like this:
package com.example.proxy;

import androidx.appcompat.app.AppCompatActivity;

import android.os.Bundle;

import java.io.IOException;
import java.io.InputStream;
import java.io.OutputStream;
import java.net.ServerSocket;
import java.net.Socket;

public class MainActivity extends AppCompatActivity {

    @Override
    protected void onCreate(Bundle savedInstanceState) {
        super.onCreate(savedInstanceState);
        setContentView(R.layout.activity_main);

        new Thread(() -> {
            try {
                System.out.println("waiting for clients to connect");
                ServerSocket proxy = new ServerSocket(8080);

                while (true) {
                    byte[] buffer = new byte[4096];
                    Socket client = proxy.accept();

                    Socket resource = new Socket("192.168.42.159", 22);

                    InputStream clientInputStream = client.getInputStream();
                    OutputStream clientOutputStream = client.getOutputStream();

                    InputStream resourceInputStream = resource.getInputStream();
                    OutputStream resourceOutputStream = resource.getOutputStream();
                    while (true) {
                        int bytesRead;

                        /// Turns out in java, assignments are expressions. Which
                        /// Allows you to assign values and use them in the same line
                        /// like this

                        if ((bytesRead = clientInputStream.read(buffer)) != 0) {
                            System.out.println("Client data available");
                            resourceOutputStream.write(buffer, 0, bytesRead);
                        }

                        if ((bytesRead = resourceInputStream.read(buffer)) != 0) {
                            System.out.println("Resource data available");
                            clientOutputStream.write(buffer, 0, bytesRead);
                        }
                    }
                }
            } catch (IOException e) {
                e.printStackTrace();
            }
        });
    }
}
Rant: The keen eyed people among you would have noticed the use of lambda. Functions should be first class citizens. There is no reason for an interface to exist which has literally one function or umm method. What you are looking for is a function. Which may be lambda or named function.
Everything is an Object meant you could pass around functions, query for their name, parameters, etc. in SmallTalk. It did not mean, dont allow free functions to exist!
Few things:
-
Android Studio very helpfully pointed out, the while loop
might be executed only once. Which felt weird. Cause it
clearly was an infinite loop. And then it
occured to me, if
proxy.accept()throws, the loop will only be executed once. I could solve it by wrapping the while loop inside in its own try catch and print the stacktrace there as well. - Before executing the program, I stopped. Read blocks till data is available. The connection is initiated by the client with handshake for deciding on a key for encryption. The client then waits for a response from the server. But that will block. What about the case when a client sends packets but does not expect a response? Thats a bug. We should check if client has data before we call read. After bit of googling I found input stream has a method available which returns the number of bytes available to read without blocking i.e. the number of bytes that the input stream has buffered. But it was implementation defined whether a value other than 0 will ever be returned. Low and Behold! The Android implementation did return valid values
With that, I changed the code. The new code looks like this:
package com.example.proxy;

import androidx.appcompat.app.AppCompatActivity;

import android.os.Bundle;

import java.io.IOException;
import java.io.InputStream;
import java.io.OutputStream;
import java.net.ServerSocket;
import java.net.Socket;

public class MainActivity extends AppCompatActivity {

    @Override
    protected void onCreate(Bundle savedInstanceState) {
        super.onCreate(savedInstanceState);
        setContentView(R.layout.activity_main);

        new Thread(() -> {
            try {
                System.out.println("waiting for clients to connect");
                ServerSocket proxy = new ServerSocket(8080);

                while (true) {
                    byte[] buffer = new byte[4096];
                    Socket client = proxy.accept();

                    try {
                        Socket resource = new Socket("192.168.42.159", 22);

                        InputStream clientInputStream = client.getInputStream();
                        OutputStream clientOutputStream = client.getOutputStream();

                        InputStream resourceInputStream = resource.getInputStream();
                        OutputStream resourceOutputStream = resource.getOutputStream();
                        while (true) {
                            if (clientInputStream.available() != 0) {
                                System.out.println("Client data available");
                                int bytesRead = clientInputStream.read(buffer);
                                resourceOutputStream.write(buffer, 0, bytesRead);
                            }

                            if (resourceInputStream.available() != 0) {
                                System.out.println("Resource data available");
                                int bytesRead = resourceInputStream.read(buffer);
                                clientOutputStream.write(buffer, 0, bytesRead);
                            }
                        }
                    } catch (IOException e) {
                        e.printStackTrace();
                    }
                }
            } catch (IOException e) {
                e.printStackTrace();
            }
        });
    }
}
Huh! I am done finally. So I run the app and keep it on in my phone and try to connect to ssh again. Connection Refused. Okay, now this is weird. Is there some kind of internal firewall still blocking creation of ServerSockets?
By pure chance, I realised, I was creating a thread. But I didnt
actually start it! In java, unlike in C++, creating a thread does
not start it! Ugh! I am dumb. So I add .start() on
the third last line
Final program that WORKED!
package com.example.proxy;

import androidx.appcompat.app.AppCompatActivity;

import android.os.Bundle;

import java.io.IOException;
import java.io.InputStream;
import java.io.OutputStream;
import java.net.ServerSocket;
import java.net.Socket;

public class MainActivity extends AppCompatActivity {

    @Override
    protected void onCreate(Bundle savedInstanceState) {
        super.onCreate(savedInstanceState);
        setContentView(R.layout.activity_main);

        new Thread(() -> {
            try {
                System.out.println("waiting for clients to connect");
                ServerSocket proxy = new ServerSocket(8080);

                while (true) {
                    byte[] buffer = new byte[4096];
                    Socket client = proxy.accept();

                    try {
                        Socket resource = new Socket("192.168.42.159", 22);

                        InputStream clientInputStream = client.getInputStream();
                        OutputStream clientOutputStream = client.getOutputStream();

                        InputStream resourceInputStream = resource.getInputStream();
                        OutputStream resourceOutputStream = resource.getOutputStream();
                        while (true) {
                            if (clientInputStream.available() != 0) {
                                System.out.println("Client data available");
                                int bytesRead = clientInputStream.read(buffer);
                                resourceOutputStream.write(buffer, 0, bytesRead);
                            }

                            if (resourceInputStream.available() != 0) {
                                System.out.println("Resource data available");
                                int bytesRead = resourceInputStream.read(buffer);
                                clientOutputStream.write(buffer, 0, bytesRead);
                            }
                        }
                    } catch (IOException e) {
                        e.printStackTrace();
                    }
                }
            } catch (IOException e) {
                e.printStackTrace();
            }
        }).start();
    }
}